Using WebP to create tiny preview images
José M. Pérez / November 28, 2015
6 min read • 4,780 views
Following with the image optimization topic, I am going to have a deeper look to Facebook's technique to create preview photos, and will show how WebP can simplify their solution.
WebP vs JPEG when encoding tiny images.
tl;dr WebP produces tiny files when compressing small images. This makes it ideal for implementing preview photos. Check the demo.
In a recent article I talked about an image loading technique used by Medium that combined a small blurry preview plus a transition to the final image. This approach has been used for some time by other sites and mobile applications, and it is getting even more focus these days as major websites try to expand in countries with very slow internet connections.
Facebook is one of them and explained some months ago how they inlined preview photos.
Finding out the right image dimensions
There is a direct relation between the dimensions of the image, its size in bytes, and the radius for the blur effect that needs to be applied to smooth the big upscaled pixels. In addition, we need to take into account the rendered dimensions of the image: we will want a larger preview the larger the rendered size is.
Facebook found that, for their mobile client, the sweet spot for the preview size was 42×42px. Then, they tried to generate the smallest (in bytes) image that they could serve with those dimensions. JPEG was the winning format, and they worked on reducing the file size even further by making the mobile client prepend a common header image and only transmit the basic image data.
Taking this approach to the web
If we want to use the same technique on a website, we need to:
- Send image data.
- Send the header.
- Send the JS code that will glue the header and the data together.
In the case of a mobile app, the code for (2) and (3) is shipped as part of the app. But in a website we need to send it as part of the response. This means that, at least the first time the user visits our page, there won't be large savings using this technique. For subsequent requests, we could use cached JS or a Service Worker to do the glueing process.
But not everything is lost.
Using a different image format
I wondered how other format files performed in file size when saving small files. I tried with PNG and GIF, and both of them were larger than JPG. Then I have it a try to WebP and I was surprised on how well it compresses images.
How I resized and compressed the images
In this page you can see the demo and all the source images generated
First, I downloaded some 64×64px cover art images using the Spotify Web API. I wanted to use square images with a consistent small size.
Then I used Photoshop to create a 42×42px JPEG version of the files, with the minimum quality settings (that is, max compression). Then I passed them through ImageOptim, that saved around 66% of the file size using a lossless optimization. The final average file size is 478 bytes.
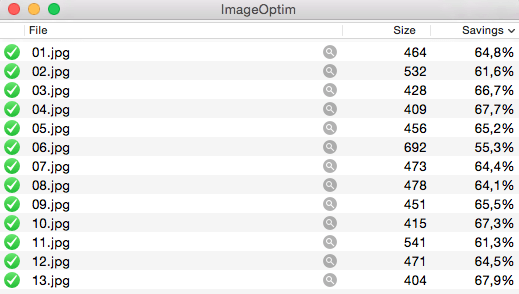
ImageOptim squeezing JPGs.
Note that Facebook don't mention what the size for their images was:
"Unfortunately, the standard JPEG header is hundreds of bytes in size. In fact, the JPEG header alone is several times bigger than our entire 200-byte budget. However, excluding the JPEG header, the encoded data payload itself was approaching our 200 bytes" - taken from The technology behind preview photos.
For the WebP version I used Photoshop to create a 42×42 px JPEG version of the files, but this time with the maximum quality settings. This is to make sure that I didn't introduce artifacts that WebP had to encode. Then again, I passed the files through ImageOptim, reducing the file size around 25%, to an average of 2.5kB.
Finally, I run cwebp to generate WebP images from the JPEG version, with the minimum quality:
for f in *.jpg; do cwebp -q 0 $f -o "$(basename $f .jpg)".webp; done
The resulting WebP images have a file size between 90 and 202 bytes, with an average of 121 bytes. That is 25% of an equivalent JPG image.
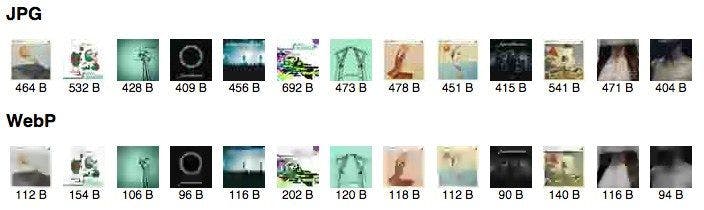
WebP vs JPEG encoding tiny placeholder images.
The artifacts generated by JPEG and WebP are quite different, but in any case, when smoothed using blur, they look almost identical:
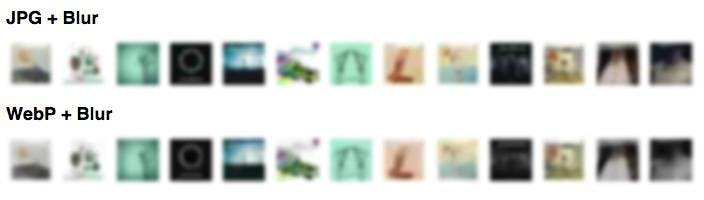
WebP vs JPEG encoding tiny placeholder images after applying a small blur effect.
Remember that these images are always shown with a blur effect, to smooth artifacts and pixels.
Medium's Progressive Loading + Inlined WebP
I have forked the CodePen I created on How Medium does progressive image loading to show how it works with WebP. You will need a browser that supports WebP to see the full effect. Otherwise, you can watch this video showing the effect.
I have resized the original image to a 42×28px thumbnail, converted to WebP and generated its Data URI:
data:image/webp;base64,UklGRnoAAABXRUJQVlA4IG4AAABQBQCdASoqABwAP/3+/3+/urWyMBVYA/A/iWIAAR7p/Y3etgh4KD8QqXEZj6waibITSIAA/cndnUz4/z4LEgByYUql75Cq/12W33KFIKQpc8L0Dt19C7NFXin0tKlxd70dzSF978msbuqLjDgAAA==
That's 199 characters. And this is the result:
You can see it better in full screen. I recommend that you use network throttling and disable cache to notice the full animation.
Conclusion
We have managed to create a file within the 200 bytes budget without having to mess with the headers nor fancy low-level hacks. Here's when I wonder if it would be possible to strip the header of the WebP files and get even higher savings.
For the web, WebP can only be used in Chrome and Opera, which limits its applicability in the real world. Interestingly for Facebook's use case, WebP is supported on native mobile apps on iOS and Android, so they could well use WebP as an alternative to their technology.